Learning consistently from practicing and getting a hell lot of errors is the best way to learn anything new. I know what's easier for us might be a little tricky or new for others. Also learning from the tutorials/websites is sometimes boring so we have to get our hands dirty to make it more interesting. I tried to explain the concepts for a beginner to have a hassle-free experience. Let's begin 😉
Kernel:
The kernel is the center of the operating system. The term kernel often refers to the operating system. The critical code of the kernel is stored in a special memory area to protect it from other programs. It is a vital component as it is the basis for the proper functioning of the entire system. The kernel performs a variety of tasks including process management, managing hardware devices and handling interrupts.
Shell:
The shell forms the layer between the user and the kernel so the user can enter commands. The kernel 'understands' only binary language, which is composed exclusively of ones and zeros. In early computing, any instructions/commands from the users were entered in binary language, but this evolved so that the user can enter commands in a more recognizable language. It is the shell that acts as the go-between, accepting the commands entered in the language recognizable by the user, and translating them to binary language for the kernel.
Difference between shell and kernel
Shell Script:
Shell Script is a file consisting of lists of commands executed sequentially. It helps in automating the day-to-day tasks of DevOps Engineer/Linux Admin and saves time. For example, if you want to schedule a backup of your file/logs then with the help of a shell script it can be automated to take a backup of the desired files at a specified time and there will be no manual intervention.
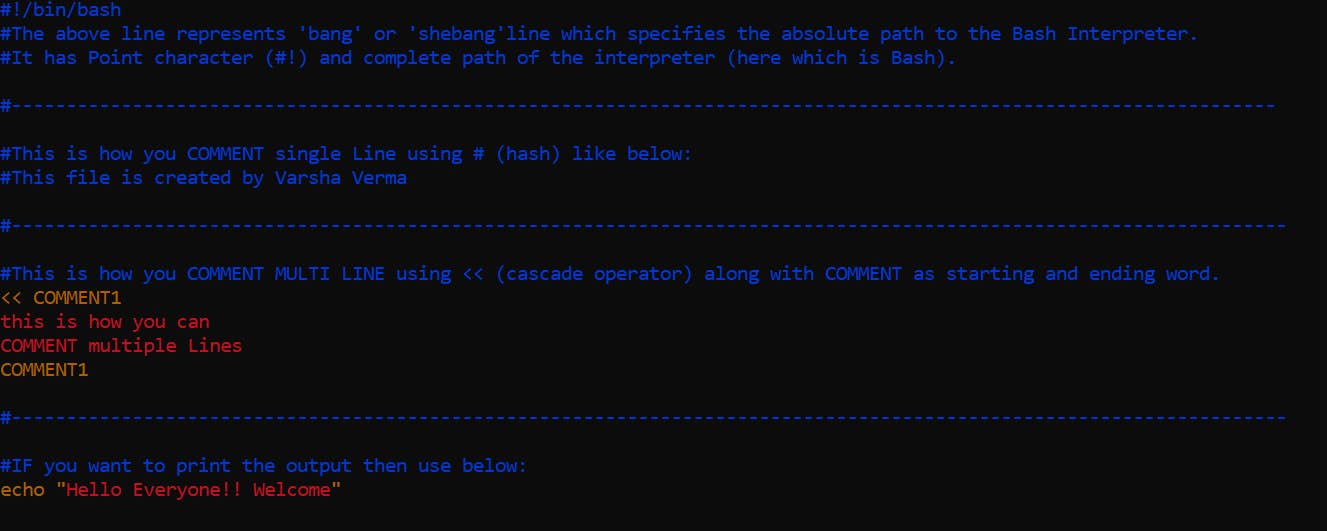
Let's write our first Shell Script 🤞:
Create and edit a file:
vi <Scriptname.sh>
(Hint: refer to below image for the script part)
Provide execute permission to the shell script:
chmod u+x <Scriptname.sh>
(Hint: Scroll down there is a detailed explanation on this under File Permission section)
Execute the script (you can use any of the below syntax):
./<ScriptName.sh>
sh <ScriptName.sh>
(Hint: Below is the output of the script)


Some of the concepts for beginners that is fascinating 🤯 (You will thank later for this)
What is Linux, an OS or Kernel?
If you ask this question to anyone you will get a mixed response. Here's why:
As we all know, in a broader concept Linux is an OS with different flavors like Redhat, Fedora, Ubuntu, CentOS etc. This means Linux is an OS.
But, If you are familiar with command "
uname" in linux (Yes correct the one which shows Kernel details) then it shows kernel name as Linux. This means Linux is a Kernel.
(Comment down which one you agree about Linux 😵💫)
Directories:
In Linux, everything is a file including programs, and to store them we need directories (if you are familiar with Windows then think of it as a folder😶🌫️).
Multiple directories that hold different configuration files related to User profiles, OS, devices, variables, mount directories, Media related, Temp files, User binaries etc. Don't worry will get a little deeper over these.

The /root directory is the home directory for the root user.
The /dev directory contains device files such as /dev/sda.
Static boot files are located in the /boot directory.
Applications and user utilities are found in the /usr directory.
The /var directory contains log files of various system applications.
All system configuration files are stored in the /etc directory.
The /home directory is where user folders are located. These include Desktop, Documents, Downloads, Music, Public, and Videos.
For add-on application packages, check them out in the /opt directory.
The /media directory stores files for removable devices such as USB drives.
The /mnt directory contains subdirectories that act as temporary mount points for mounting devices such as CD-ROMs.
The /proc directory is a virtual filesystem that holds information on currently running processes. It is a strange filesystem that is created upon a system boot and destroyed upon shutdown.
The /bin directory contains user command binary files.
The /lib directory stores shared library images and kernel modules.
Types of Files:
Regular files (-): These contains programs, executable files and text files.
Directory files (d): It is shown in blue color. It contains lists of files.
Special files
Block file (b)
Character device file (c)
Named pipe file (p)
Symbolic link file (l)
Socket file (s)
Prefix & Description | |
- | Regular files, such as an ASCII text file, binary executable, or hard link. |
b | Block special file. Block input/output device files such as a physical hard drive. |
c | Character special file. Raw input/output device files such as a physical hard drive. |
d | Directory file that contains a listing of other files and directories. |
l | Symbolic link file. Links on any regular file. |
p | Named pipe. A mechanism for inter-process communications. |
s | The Socket is used for inter-process communication. |
Basic Commands for Files:
Command | Description | Formats |
Determines file type. | file <Filename> | |
to view details (Access, Modify, change time, size, inode, block ... ) | stat [OPTION] <Filename> | |
Used to create a file. | touch <Filename> | |
To remove a file. | rm <Filename> | |
To copy a file. | cp <Source File> <Destination> | |
To rename or to move a file. | rm filename1 filename2 filename3 | |
To rename files. | mv <original name> |
Different ways to list the files:
There are multiple ways to list a file and you will see the difference between all of them. This is something you didn’t find anywhere, below is simple yet effective image to compare and understand :

Let’s take the below example and understand each column in detail:
Example1:

File Permissions | Number of memory blocks | Owner | Group | File Size in KB | Month, Date | Directory name /File name |
1 | 2 | 3 | 4 | 5 | 6 | 7 |
First Column − Represents the file type and the permission given on the file. Below is the description of all type of files.
Second Column − Represents the number of memory blocks taken by the file or directory.
Third Column − Represents the owner of the file. This is the user who created this file.
Fourth Column − Represents the group of the owner. Every user will have an associated group.
Fifth Column − Represents the file size in bytes.
Sixth Column − Represents the date and the time when this file was created or modified for the last time.
Seventh Column − Represents the file or the directory name.
File Permissions:
Number | Permission Representation | Ref | Octal representation |
0 | No permission | --- | 0 |
1 | Execute permission | --x | 1 |
2 | Write permission | -w- | 2 |
3 | Execute and write permission: 1 (execute) + 2 (write) | -wx | 3 |
4 | Read permission | r-- | 4 |
5 | Read and execute permission: 4 (read) + 1 (execute) | r-x | 5 |
6 | Read and write permission: 4 (read) + 2 (write) | rw- | 6 |
7 | All permissions: 4 (read) + 2 (write) + 1 (execute) | rwx | 7 |

1 | 2 | 3 | 4 | 5 | 6 | 7 | 8 | 9 | 10 |
- | r | w | x | r | w | x | r | w | x |
File type | User permission | Group Permission | Others |

Inode Number | File Permissions | Number of Symbolic Link | Owner | Group | Size in KB | Month Date | Modified Time | Directory name /File name |
1 | 2 | 3 | 4 | 5 | 6 | 7 | 8 | 9 |
Modifying permission via chmod:
This is used to modify the file permission for Users, Groups and Others
chmod <options> <permission> <File/Directory Name>

Command Action for option:
-c verbose: only report the changes made
-v Verbose: outputs the diagnostics for every request made
-R Recursively: applies the operation on files and directories
Changing Owner via chown:
This is used to modify the owner of a file
chown <owner name> <file>

Changing Group via chgrp:
This is used to modify the group of the file.
chgrp <group name> file

Controlling access to files with ACLs (Access control list)
ACLs are used on Linux filesystems to set custom and more personalized permissions on files and folders. ACLs allow file owners or privileged users to grant rights to specific users or to specific groups.
In Linux, as you probably know, the permissions are divided into three categories : one for the owner of the file, one for the group and one for the others. However, in some cases, you may want to grant access to a directory (the execute permission for example) to a specific user without having to put this user into the group of the file.
This is exactly why access control lists were invented in the first place.
On Linux, access control lists are not enabled when you create a new file or directory on your host (except if a parent directory has some ACLs predefined).
ACL is not pre-installed over the machine. We can use Below Syntax:
apt-get install acl
To see if access control lists are defined for a file or directory, run the ls command and look for a “+” character at the end of the permission line.

Checking access control lists using getfaclL
The getfacl command is used on Linux to print a complete listing of all regular permissions and access control lists permissions on a file or directory.
getfacl <file/directory>

Setting access control lists using setfacl:
The setfacl command is used on Linux to create, modify and remove access control lists on a file or directory.
setfacl {-m, -x} {u, g}:<name>:[r, w, x] <file, directory>
Where curly brackets mean one of the following options and regular brackets mean one or several items.
-m : means that you want to modify one or several ACL entries on the file or directory.
-x : means that you want to remove one or several ACL entries on a file or directory.
{u, g} : if you want to modify the ACL for a user or for a group.
name : this is an optional parameter, it can be omitted if you want to set the ACL entries for every user or for every group on your host.
[r, w, x] : in order to set read, write or execute permissions on the file or directory.
For example, in order to set specific write permissions for a user on a file, you would write the following command:
$ setfacl -m u:user:w <file, directory>
In order to set execute permissions for all users on your host, you would write the following command:
$ setfacl -m u::x <file, directory>
To set full permissions for a specific group on your host, you would write the setfacl this way
setfacl -m g:group:rwx <file, directory>
Now let’s say that you want to remove an ACL entry from a file.
In order, to remove a user specific entry from a file, you would specify the x option.
Note : you cannot specific rights from a single ACL entry, meaning that you can’t remove write permissions, keeping the ACL read permissions active.
setfacl -x u:<user> <file, directory>
Similarly, to remove ACL related to groups on your host, you would write the following command:
setfacl -x g:<group> <file, directory>
Example1: Adding Write permission for another user:

Users Management:
It is broadly categorized as Users, groups and Permission.
Users:
There are two kinds of accounts you will see in /etc/passwd :
A. System accounts are used by daemons to access files and directories. These will
usually be disallowed from interactive login via shell or physical console login.
B. Interactive accounts are used by end-users to access computing resources from
either a shell or physical console login.
How to add Users?
useradd <options> <groupname> <username>
options | Action |
c | Adds a comment to the user account |
m | Creates user home directory in the default location, if nonexistent |
g | Default group to assign the user |
n | Does not create a private group for the user, usually a group with the username |
-M | Creates user without home directory |
s | Default shell other than /bin/bash |
u | Specifies UID (otherwise assigned by the system) |
g | Additional groups to assign the user to. |
For Example,
useradd -c "Devops Engineer" -m -g Devops varsha

Here user will be added and a home directory will be created along. You can view the user inside the below file:
cat /etc/passwd
This file holds user lists along with their home directory, UID,GID permissions. Below is the representation of each section of the entries inside passwd file:

Sample Output:
Let me explain with the help of below highlighted example. Here,
gnats: username
[This field can store maximum 32 characters. This field cannot be empty. Case sensitive]
x: The Encrypted password
[Historically, this field was used to store user’s password encrypted with DES algorithm. Over the time computing power increased and DES algorithm became trivial to crack.
To use a more secure algorithm, Linux moved user’s password in a separate file /etc/shadow. Since user’s password no longer stored in this field, a placeholder value x is used to indicate that actual password is stored in other location]
41:UserID (UID)
41: GroupID (GID)
Gnats Bug Reporting System (admin): User Description
/var/lib/gnats: User's Home Directory
/usr/sbin/nologin: User's Login Shell

To check the User ID, group ID & Groupname it is part of?
id <username>
How to Create/change the Password for users?
passwd <username>
How to disable user account?
There are several methods to disable accounts on a system. These range from editing the /etc/passwd file by hand. Or even using the passwd command with the -l switch.
Both of these methods have one big drawback: if the user has ssh access and uses an RSA key for authentication, they can still login using this method. Now let’s use the chagecommand, changing the password expiry date to a previous date. Also, it may be good to make a note on the account as to why we disabled it.
chage [options] <username>
Options | Details |
-d, --lastday LAST_DAY | Set the number of days since when the password was last changed. The date may also be expressed in the format YYYY-MM-DD (or the format more commonly used in your area). If the LAST_DAY is set to 0 the user is forced to change his password on the next log-on. |
-E, --expiredate EXPIRE_DATE | Set the date or number of days since which the user's account will no longer be accessible. The date may also be expressed in the format YYYY-MM-DD (or the format more commonly used in your area). A user whose account is locked must contact the system administrator before being able to use the system again. (Passing the number -1 as the EXPIRE_DATE will remove an account expiration date) |
-h, --help | Display help message and exit. |
-i, --iso8601 | When printing dates, use the YYYY-MM-DD format |
-I, --inactive INACTIVE | Set the number of days of inactivity after a password has expired before the account is locked. The INACTIVE option is the number of days of inactivity. A user whose account is locked must contact the system administrator before being able to use the system again. (Passing the number -1 as the INACTIVE will remove an account's inactivity.) |
-l, --list | Show account aging information. |
-m, --mindays MIN_DAYS | Set the minimum number of days between password changes to MIN_DAYS. A value of zero for this field indicates that the user may change their password at any time. |
-M, --maxdays MAX_DAYS | Set the maximum number of days during which a password is valid. When MAX_DAYS plus LAST_DAY is less than the current day, the user will be required to change their password before being able to use their account. This occurrence can be planned for in advance by use of the -W option, which provides the user with advance warning. (Passing the number -1 as MAX_DAYS will remove checking a password's validity.) |
-R, --root CHROOT_DIR | Apply changes in the CHROOT_DIR directory and use the configuration files from the CHROOT_DIR directory. Only absolute paths are supported. |
-W, --warndays WARN_DAYS | Set the number of days of warning before a password change is required. The WARN_DAYS option is the number of days before the password expires that a user will be warned their password is about to expire. |
Example:

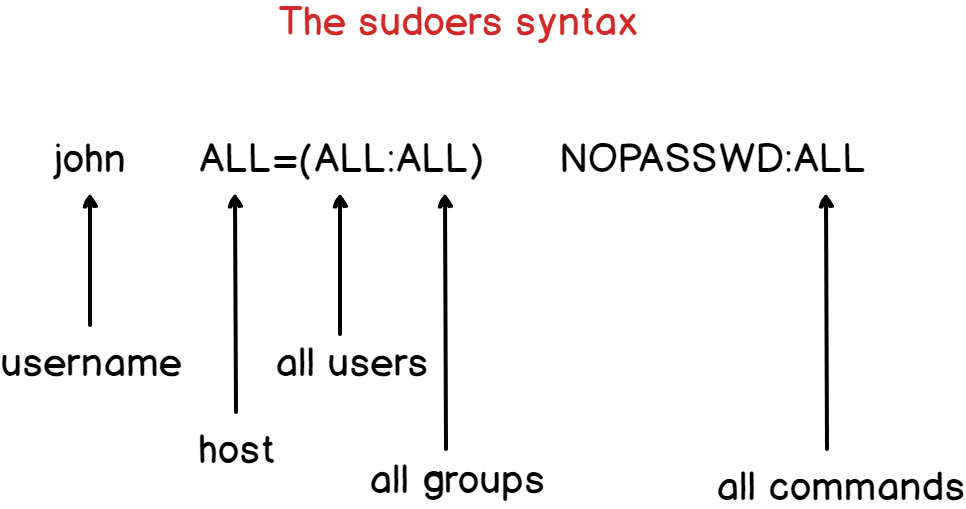
Sudoers File:
The sudoers file is a file Linux and Unix administrators use to allocate system rights to system users. This allows the administrator to control who does what. Remember, Linux is built with security in mind so don't play with this file 😵💫
cat /etc/sudoers

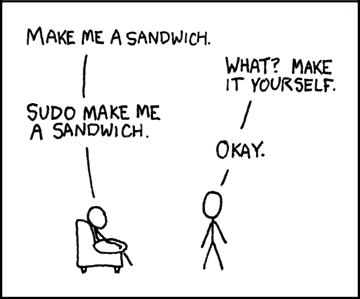
Thanks for reading till the end, I hope you got some knowledge. Here is a BONUS to make you smile #Linux_Memes:

If you like my work, Let's connect and collaborate😃. I am available on the below platforms and very much active there:
https://www.linkedin.com/in/varsha-verma-182a04148/
https://github.com/Varsha-Verma/
https://cloud-and-devops.hashnode.dev/
