CI-CD Website hosting using GitLab

Introduction:
This blog covers step by step guide on how you can host your very own website. If you are student and still you don't have subscription for any Cloud provider, nothing's to worry. You can still host any website (Frontend/static) using GitLab.
Pre-requisites
GitLab Account (Free tier /Student tier will work) ✨
Any Code Editor (I used VSCode) 👩💻
Git Installation on your Laptop 💻
Repo for the sample code
Please Gitlab here - Repo Link
Steps to Follow
Create an Account in Gitlab
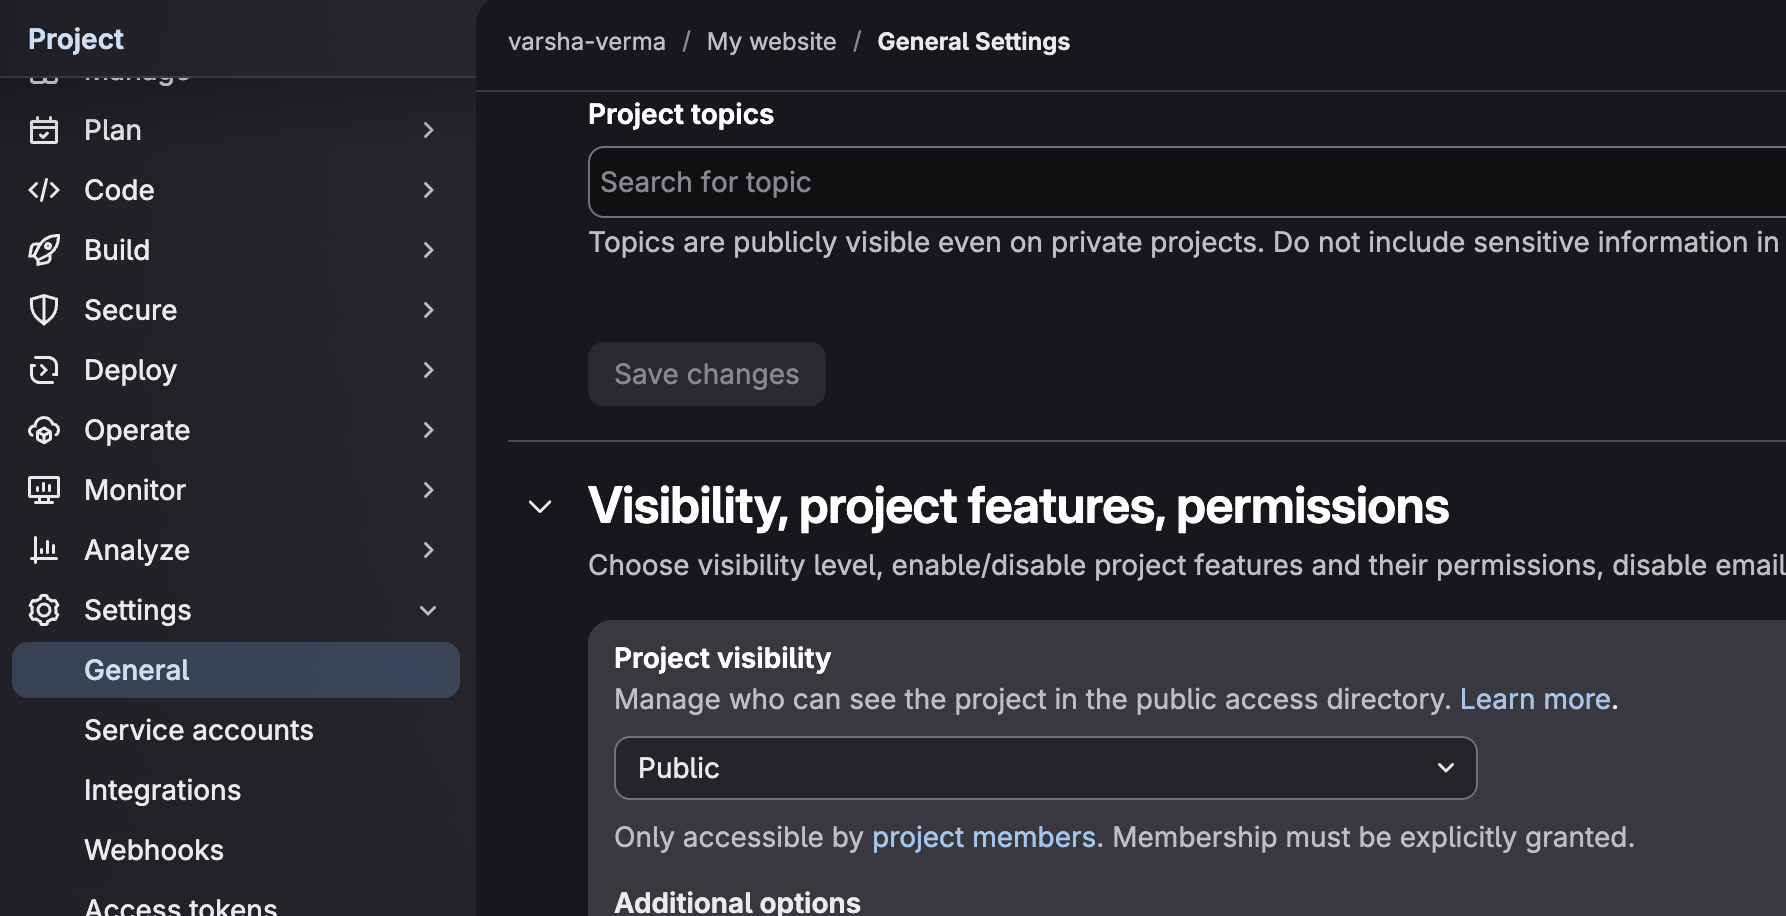
Now create a blank repository. Now go to setting in Left pane and select
Setting -> General -> Visibility, Project features, Permissions -> PUBLIC -> save
Once this is done, Move to your CLI console (VSCode), and create a folder.
I am assuming, you already installed Git in your laptop, if not use this LINK.
Move to your code editor and let's begin.
Create a folder in your local & Initialize it, then configure username and Email:
git init

git config --global user.name "Your Name"

git config --global user.email "your-email@example.com"
- Generate SSH keygen
ssh-keygen -t ed25519 -C "your-email@example.com"
- Copy the output from:
cat ~/.ssh/id_ed25519.pub
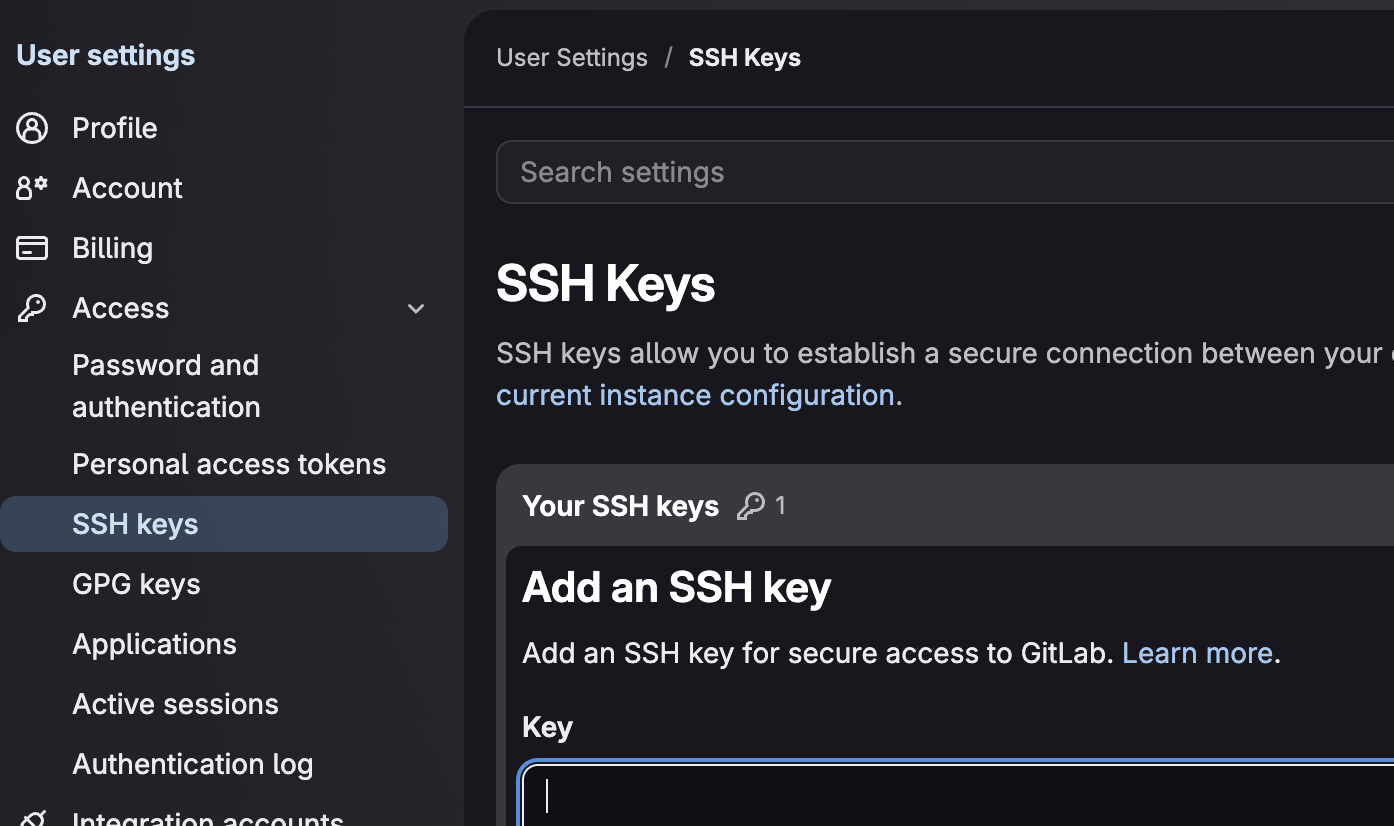
- Paste this in mentioned path: User setting -> Access -> SSH Keys -> create New key -> Paste -> Save
- Test connection:
ssh -T git@gitlab.com
Output: Welcome to GitLab, @yourusername!
- For now, there are no remote repository added:

- Adding remote repository :
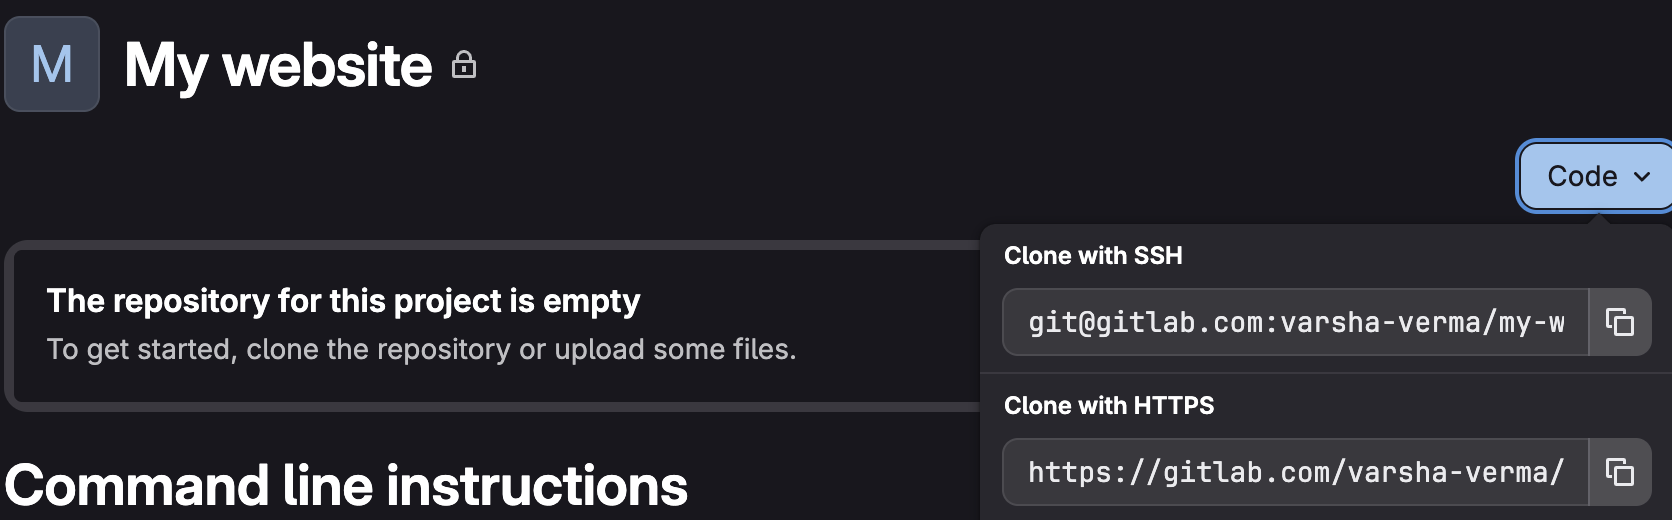
If using SSH then copy 1st one, this is helpful to avoid using password for ever push/pull.
You need to add for the first time, later if required you can reset using set-url command:
git remote add origin git@gitlab.com:username/repo.git

git remote set-url origin git@gitlab.com:username/repo.git
- If using Https, then config PAT (Personal Access token) for every pull or push
git remote add origin https://gitlab.com/<your-username>/my-static-website.git
- I am using the 1st method (SSH). Now, Add two file :
Index.html
<!DOCTYPE html>
<html>
<head>
    <title>My Portfolio</title>
    <link rel="stylesheet" href="style.css">
</head>
<body>
    <h1>Hello, I'm a DevOps Engineer 🚀</h1>
    <p>This is my portfolio hosted on GitLab Pages.</p>
</body>
</html>
style.css:
body {
    font-family: Arial;
    background-color: #f4f4f4;
    text-align: center;
}
h1 {
    color: #6c5ce7;
}
- Check git status to see the files in working directory, which are not yet committed:
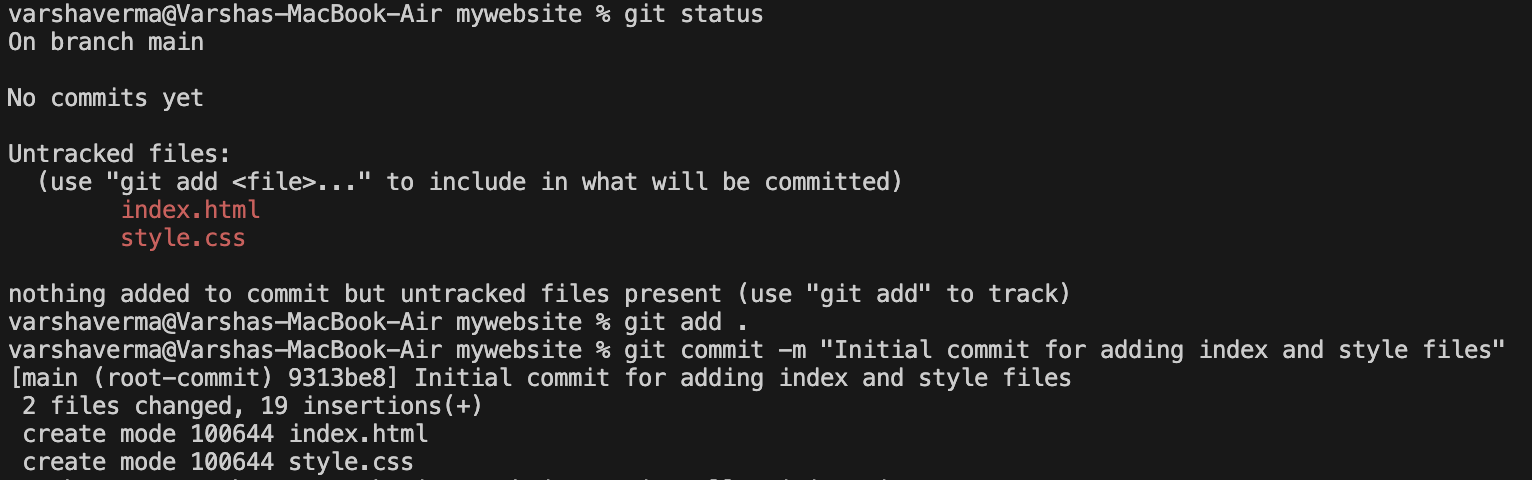
- Use below to commit and push:
git add .
git commit -m "Commit_comment"
git push -u origin main
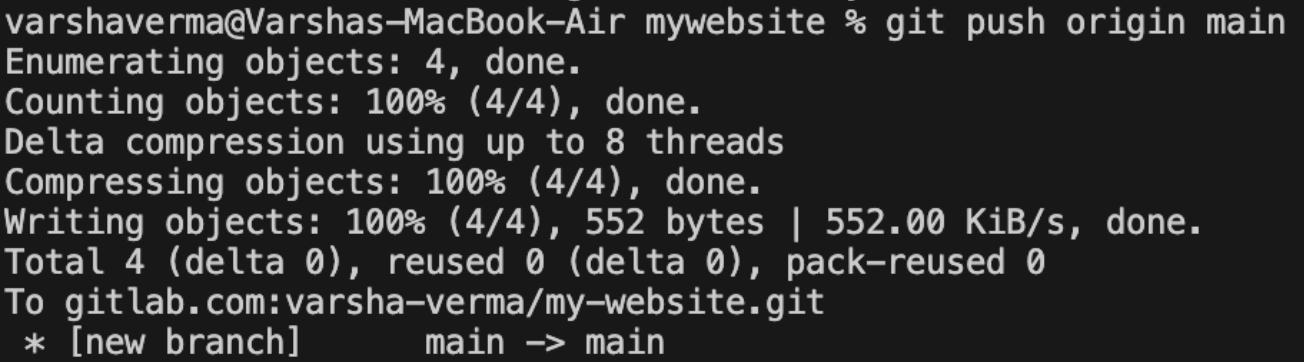
Check the logs using git log, this will show you all the commits.
This is now visible in Gitlab repo
Now we have to create CI-CD Pipeline, for that we need to create .gitlab-ci.yml in our local
pages:
  stage: deploy
  script:
    - mkdir public
    - cp -r * public/
  artifacts:
    paths:
      - public
  only:
    - main
🔑 What this does:
Creates a
publicfolderCopies website files into it
Deploys via GitLab Pages
If above fails, try this:
pages:
  stage: deploy
  script:
    - mkdir -p public
    - cp index.html public/
    - cp -r assets public/ || true
    - cp style.css public/ || true
  artifacts:
    paths:
      - public
💡 Why this works:
Avoids copying
.gitfolder ❌Handles missing files safely ✅
Ensures
public/exists ✅
- This should be the file structure, if it is not like this, mostly your pipeline will fail:
my-website/
├── index.html   ✅
├── style.css
├── .gitlab-ci.yml
- Commit this as well:
git add .gitlab-ci.yml git commit -m "Add GitLab Pages pipeline" git push origin main
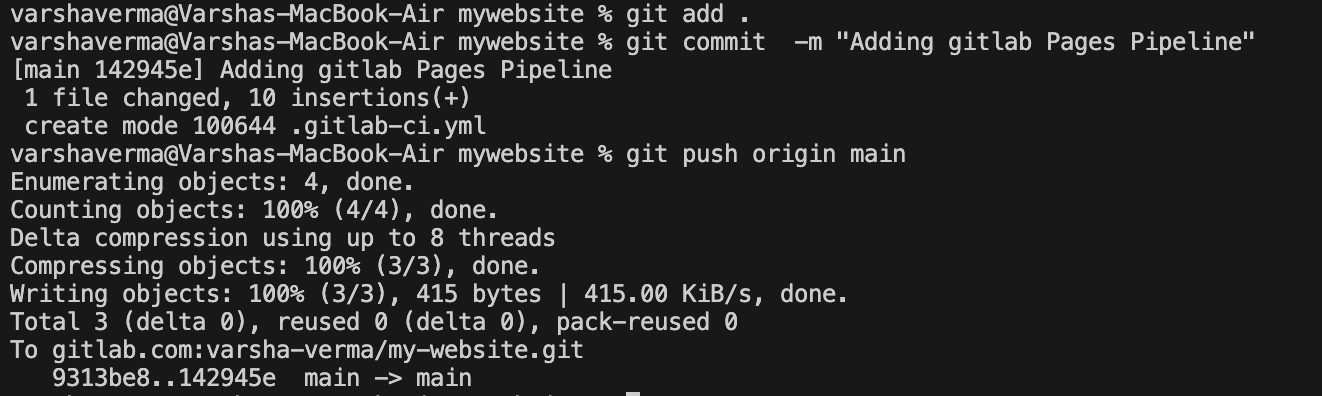
Once this is done Verify the Pipeline Go to
CI/CD → Pipelines
Check status:
✅ Passed = Website Live
❌ Failed = Fix YAML errors
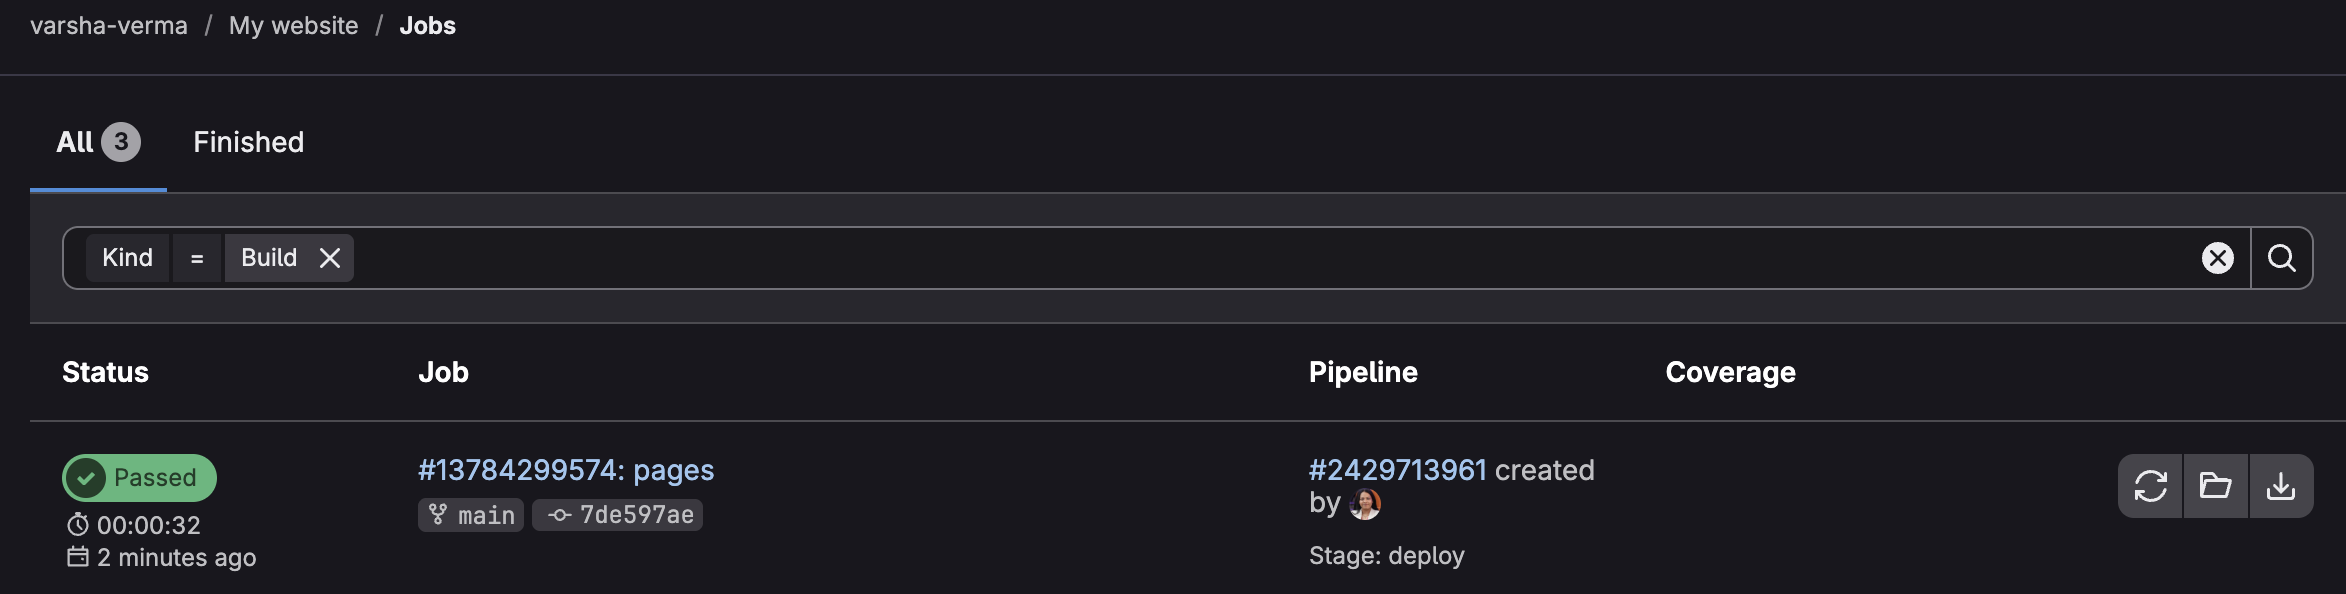
- If Pipeline is passed, the Pages option is visible at Deploy -> Pages
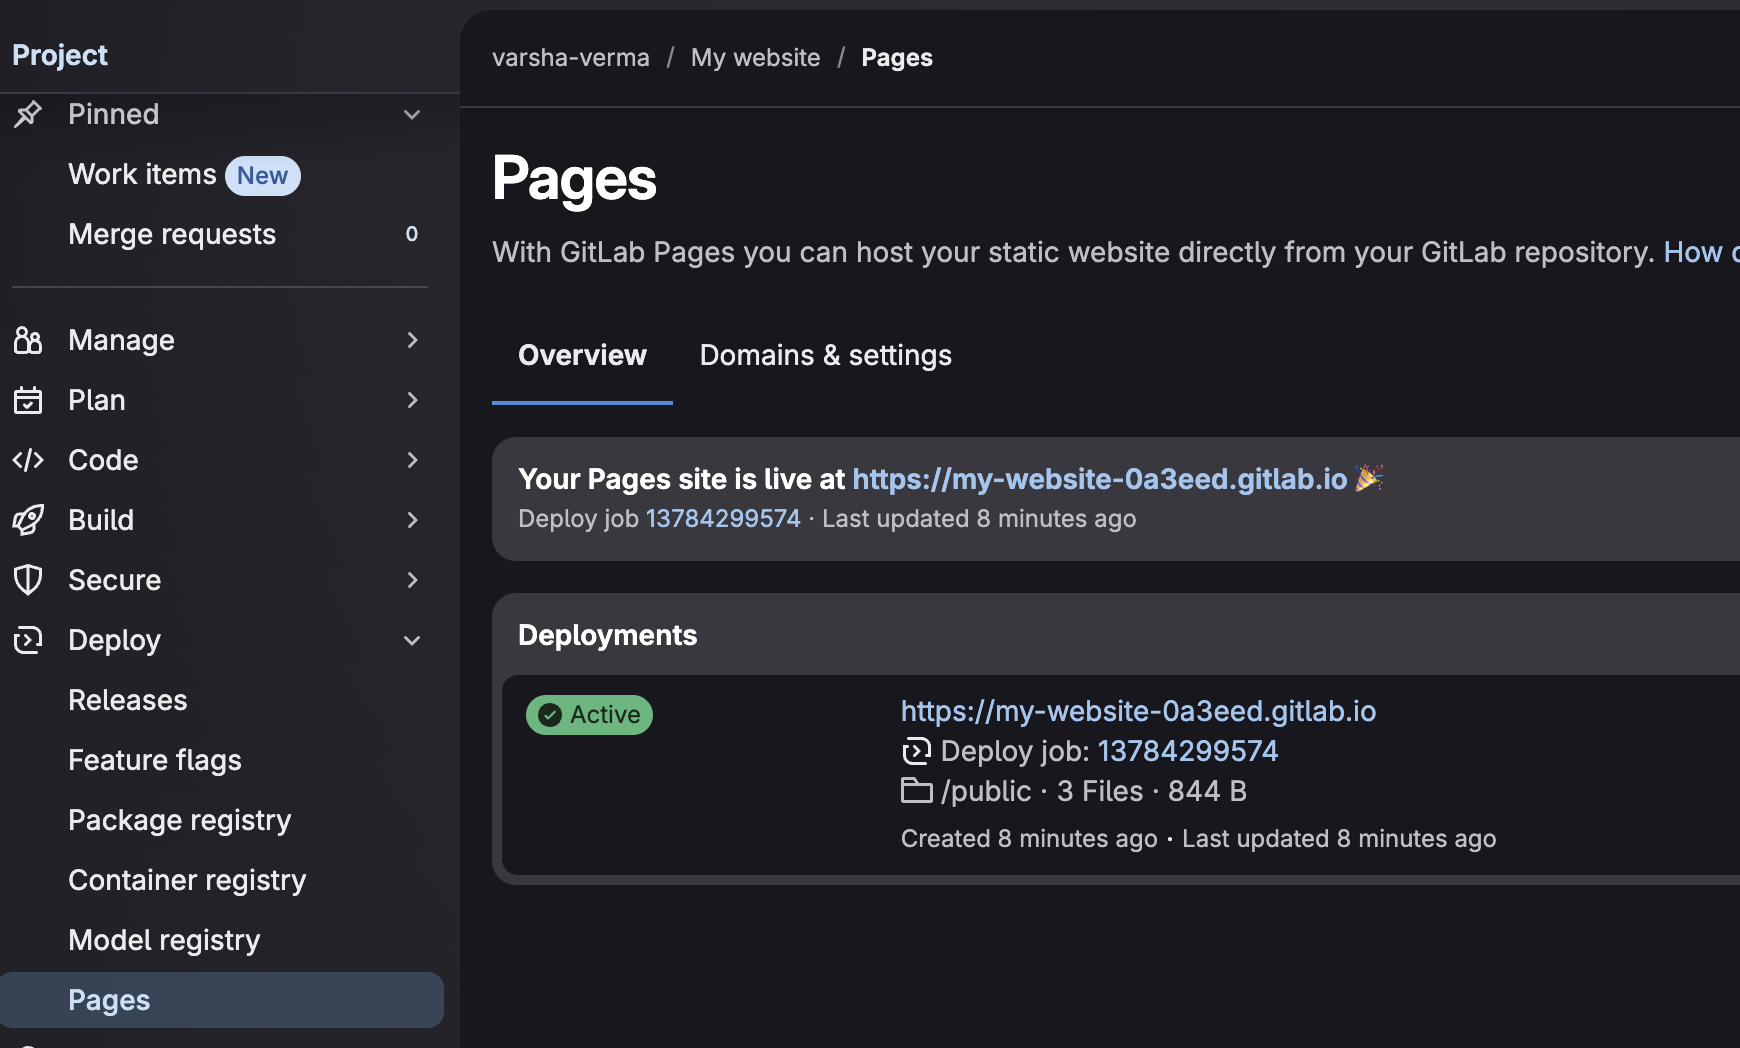
Click on the link to open the Webpage
And there you are you hosted your very own website
“This is just HTML (Frontend), but looks like a real production website. No frameworks. No backend.”
If I will modify the html file again and push the code to the Gitlab, it will automatically update the website because of the pipeline that we built, without any manual intervention.
Play around and feel free to modify the website code and share your learning.
“GitLab Pages is like AWS S3 hosting + CI/CD combined—but completely free.”
Additional Repo Link:
I have created a cafe website, if you are interested, feel free to check the repository (fork it⋔, star it ⭐️ and show your creativity 😉)
What's the hurry, Its in progress, will post it on Tuesday.
Thanks for reading till the end, I hope it was helpful.
If you like my work, Let's connect and collaborate😃. I am available on the below platforms and very much active there:
Linkedinℹ️
GitHub😻
Blogs👩🏾💻
Topmate🤝
AWS Blogs☁️
Let me know if this helps and feel free to add your suggestions and resources to help the community🤝